 ARM"/>
22.从0学ARM
经过前面一章的学习,我们已经了解了什么是uboot,本章主要目的是如何编译和移植uboot,增加串口、网络、emmc等功能,让他支持exynos4412开发板。
一、移植步骤
1. Uboot配置
- 指定交叉编译工具链
进入uboot代码根目录
$ cd u-boot-2013.01
修改 Makefile
在
ifeq ($(HOSTARCH),$(ARCH))CROSS_COMPILE ?=
endif
下添加
ifeq   (arm,$(ARCH))CROSS_COMPILE ?= arm-none-linux-gnueabi-
endif
- 指定产品CPU
我们产品用的CPU是 exynos 4412;
查看u-boot源码:
arch/arm/cpu/armv7/exynos/
可见U-boot已支持该CPU。
- 指定产品BOARD
三星公司已经为exynos 4412发布了初始化的程序:
- cpu硬件信息
对应的该CPU硬件信息头文件位于以下位置:
include/configs/origen.h
该文件定义了uboot启动必须关于exynos 4412必须的一些资源信息。
- boards.cfg
在uboot-2013-01中,顶层目录下的boards.cfs文件中查看它支持的开发板和相应的信息,后续的编译过程需要根据配置名检索到相应的信息。
文件格式如下:
和以前的老版本比,配置更加规范化了,其实这些就是相关文件分类的一个文件夹的描述。
依照这个层次关系,我们可以很方便的对我们开发板进行配置。
- 编译u-boot
不同版本的uboot的配置命令可能是不同的,源码包的文件README通常会有相应的配置命令【其他版本的uboot会不一样】:
配置和编译命令如下:
$ make  distclean
$ make  origen_config
改配置命令会生成以下文件:
include/config.h
编译:
$ make all
编译完成后生成的u-boot.bin就是可执行的镜像文件。
但是并不会生成真正适配我们板子的uboot,只是适配参考板,该文件还不能在我们板子上运行,我们需要对u-boot源代码进行相应的修改。
2. 确认第一条指令有运行到 (点灯法)
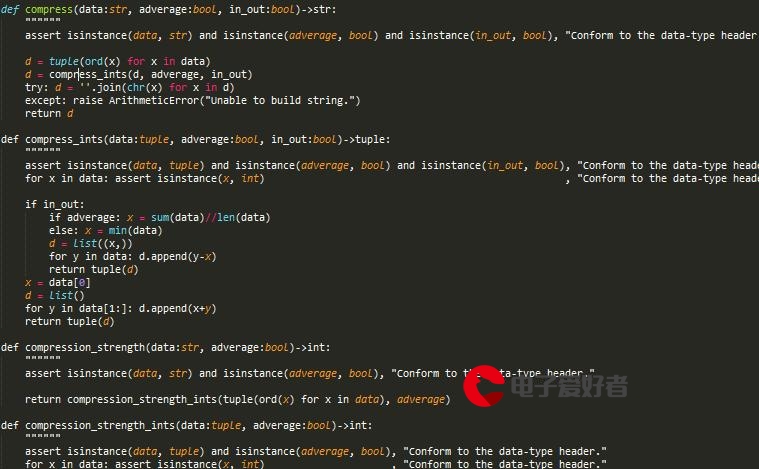
在arch/arm/cpu/armv7/start.S 134 行后添加点灯程序
#if 1ldr r0, =0x11000c40 @GPX2_7 led2ldr r1, [r0]bic r1, r1, #0xf0000000orr r1, r1, #0x10000000str r1, [r0]ldr r0, =0x11000c44mov r1,#0xffstr r1, [r0]
#endif
因为uboot刚启动的时候,串口没有来得及初始化,我们可以通过点亮LED的方法来判断程序是否执行到此处。
代码详解参考《十、LED汇编、C语言驱动编写》
3. 添加三星加密方式
exynos 需要三星提供的初始引导加密后,我们的u-boot,才能被引导运行,这其中要用到下面的几个命令或三星提供的工具软件,这些操作的目的就是根据三星的芯片的启动要求对uboot.bin 进行一些处理,包括在特定长度的位置加上和校验信息以及插入一些文件段。
$cp  sdfuse_q  u-boot-2013.01  -rf
$ chmod  777  u-boot-2013.01/sdfuse_q  -R
$cp  CodeSign4SecureBoot  u-boot-2013.01  -rf
注:CodeSign4SecureBoot 三星提供的安全启动方式 ,对应的程序由三星提供。
sdfuse_q目录下的文件是针对三星堆uboot.bin文件格式要求进行加密编写的文件。
修改根目录Makefile,实现sdfuse_q的编译
在
$(obj)u-boot.bin: $(obj)u-boot$(OBJCOPY) ${OBJCFLAGS} -O binary $< $@$(BOARD_SIZE_CHECK)
下添加
@#./mkuboot@split -b 14336 u-boot.bin bl2@make -C sdfuse_q/@#cp u-boot.bin u-boot-4212.bin@#cp u-boot.bin u-boot-4412.bin@#./sdfuse_q/add_sign@./sdfuse_q/chksum@./sdfuse_q/add_padding@rm bl2a*@echo
注意是tab键缩进的,否则makefile编译报错
注意如果执行了make distclean 需重新拷贝CodeSign4SecureBoot
为方便起见,在根目录下创建编译脚本build.sh,该脚本将自动完成添加加密方式。
1 #!/bin/sh2 3 sec_path="CodeSign4SecureBoot/"4 CPU_JOB_NUM=$(grep processor /proc/cpuinfo | awk '{field=$NF};END{print field+1}')5 ROOT_DIR=$(pwd)6 CUR_DIR=${ROOT_DIR##*/}7 8 case "$1" in9 clean)10 echo make clean11 make mrproper12 ;;13 *)14 15 if [ ! -d $sec_path ]16 then17 echo "**********************************************"18 echo "[ERR]please get the CodeSign4SecureBoot first"19 echo "**********************************************"20 return21 fi 22 23 make origen_config24 25 make -j$CPU_JOB_NUM26 27 if [ ! -f checksum_bl2_14k.bin ]28 then29 echo "!!!!!!!!!!!!!!!!!!!!!!!!!!!!!!!!!!!!!!!!!!!!!!!!!!!!!!!!!!!!!!!!!!!!!!!!!!!!!!!"30 echo "There are some error(s) while building uboot, please use command make to check."31 echo "!!!!!!!!!!!!!!!!!!!!!!!!!!!!!!!!!!!!!!!!!!!!!!!!!!!!!!!!!!!!!!!!!!!!!!!!!!!!!!!"32 exit 033 fi34 35 cp -rf checksum_bl2_14k.bin $sec_path36 cp -rf u-boot.bin $sec_path37 rm checksum_bl2_14k.bin38 39 cd $sec_path40 cat E4412_N.bl1.SCP2G.bin bl2.bin all00_padding.bin u-boot.bin tzsw_SMDK4412_SCP_2GB.bin > u-boot-origen.bin41 mv u-boot-origen.bin $ROOT_DIR42 43 rm checksum_bl2_14k.bin44 rm u-boot.bin45 46 echo 47 echo 48 ;;49 50 esac
编译脚本
$ chmod   777  u-boot-2013.01/ build.sh
$ ./buildsh
注:build.sh 脚本方式完成自动添加加密方式,
编译生成所需文件u-boot_origen.bin
root@ubuntu:/home/peng/uboot/u-boot-2013.01# ls
api                  config.mk  examples     Makefile  sdfuse_q         u-boot.bin
arch                 COPYING    fs           mkconfig  snapshotmit  u-boot.map
board                CREDITS    helper.mk    nand_spl  spl              u-boot-origen.bin
boards.cfg           disk       include      net       System.map       u-boot.srec
build.sh             doc        lib          post      test
CodeSign4SecureBoot  drivers    MAINTAINERS  README    tools
common               dts        MAKEALL      rules.mk  u-boot
4. 实现串口输出
修改lowlevel_init.S文件
$vim board/samsung/origen/lowlevel_init.S
a) 添加临时栈,在
41 lowlevel_init:
后添加
ldr sp,=0x02060000 @use iRom stack in bl2
b) 添加关闭看门狗代码:
在
67 beq wakeup_reset
后添加
#if 1 /*for close watchdog */    /* PS-Hold high */ldr r0, =0x1002330cldr r1, [r0]orr r1, r1, #0x300str r1, [r0]         ldr     r0, =0x11000c08ldr r1, =0x0str r1, [r0]
/* Clear  MASK_WDT_RESET_REQUEST  */ldr r0, =0x1002040cldr r1, =0x00str r1, [r0]
#endif
c) 添加串口初始化代码:
在uart_asm_init: 的
351 str r1, [r0, #EXYNOS4_GPIO_A1_CON_OFFSET]
后添加
ldr r0, =0x10030000 ldr r1, =0x666666 ldr r2, =CLK_SRC_PERIL0_OFFSETstr r1, [r0, r2]ldr r1, =0x777777 ldr r2, =CLK_DIV_PERIL0_OFFSETstr r1, [r0, r2]
d) 注释掉trustzone初始化
注释掉
104 bl uart_asm_init
下的代码:
#if 0bl tzpc_init
#endif
5. 网卡移植
因为各个厂家使用的网卡不尽相同,所以三星公司提供的驱动程序只预留了网卡初始化的函数入口,针对不同的板子,我们需要针对电路自己移植网卡的驱动。
网卡的驱动详解,我们会在后一章节详细讲解。
1、 添加网络初始化代码
$ vim board/samsung/origen/origen.c
在
31 struct exynos4_gpio_part2 *gpio2;
后添加:
#ifdef CONFIG_DRIVER_DM9000
#define EXYNOS4412_SROMC_BASE 0X12570000#define DM9000_Tacs     (0x1)
#define DM9000_Tcos     (0x1)
#define DM9000_Tacc     (0x5)
#define DM9000_Tcoh     (0x1)
#define DM9000_Tah      (0xC)
#define DM9000_Tacp     (0x9)
#define DM9000_PMC      (0x1)  struct exynos_sromc {unsigned int bw;unsigned int bc[6];
};/** s5p_config_sromc() - select the proper SROMC Bank and configure the* band width control and bank control registers* srom_bank    - SROM* srom_bw_conf  - SMC Band witdh reg configuration value* srom_bc_conf  - SMC Bank Control reg configuration value*/
void exynos_config_sromc(u32 srom_bank, u32 srom_bw_conf, u32 srom_bc_conf)
{unsigned int tmp;struct exynos_sromc *srom = (struct exynos_sromc *)(EXYNOS4412_SROMC_BASE);/* Configure SMC_BW register to handle proper SROMC bank */tmp = srom->bw;tmp &= ~(0xF << (srom_bank * 4));tmp |= srom_bw_conf;srom->bw = tmp;/* Configure SMC_BC register */srom->bc[srom_bank] = srom_bc_conf;
}
static void dm9000aep_pre_init(void)
{unsigned int tmp;unsigned char smc_bank_num = 1;unsigned int     smc_bw_conf=0;unsigned int     smc_bc_conf=0;/* gpio configuration */writel(0x00220020, 0x11000000 + 0x120);writel(0x00002222, 0x11000000 + 0x140);/* 16 Bit bus width */writel(0x22222222, 0x11000000 + 0x180);writel(0x0000FFFF, 0x11000000 + 0x188);writel(0x22222222, 0x11000000 + 0x1C0);writel(0x0000FFFF, 0x11000000 + 0x1C8);writel(0x22222222, 0x11000000 + 0x1E0);writel(0x0000FFFF, 0x11000000 + 0x1E8);              smc_bw_conf &= ~(0xf<<4);smc_bw_conf |= (1<<7) | (1<<6) | (1<<5) | (1<<4);smc_bc_conf = ((DM9000_Tacs << 28)| (DM9000_Tcos << 24)| (DM9000_Tacc << 16)| (DM9000_Tcoh << 12)| (DM9000_Tah << 8)| (DM9000_Tacp << 4)| (DM9000_PMC));exynos_config_sromc(smc_bank_num,smc_bw_conf,smc_bc_conf);
}
#endif
在
gd->bd->bi_boot_params = (PHYS_SDRAM_1 + 0x100UL);
后添加
#ifdef CONFIG_DRIVER_DM9000dm9000aep_pre_init();
#endif
在文件末尾添加
#ifdef CONFIG_CMD_NET
int board_eth_init(bd_t *bis)
{      int rc = 0;
#ifdef CONFIG_DRIVER_DM9000rc = dm9000_initialize(bis);
#endif                                                                         return rc;
}
#endif
2、 修改配置文件添加网络相关配置
$ vim include/configs/origen.h
修改
85 #undef CONFIG_CMD_PING
为
#define CONFIG_CMD_PING
修改
90 #undef CONFIG_CMD_NET
为
#define CONFIG_CMD_NET
在文件末尾
#endif /* __CONFIG_H */
前面添加
#ifdef CONFIG_CMD_NET
#define CONFIG_NET_MULTI
#define CONFIG_DRIVER_DM9000  1
#define CONFIG_DM9000_BASE    0x05000000 //内存基地址
#define DM9000_IO      			CONFIG_DM9000_BASE
#define DM9000_DATA    			(CONFIG_DM9000_BASE + 4)
#define CONFIG_DM9000_USE_16BIT
#define CONFIG_DM9000_NO_SROM  1
#define CONFIG_ETHADDR 		11:22:33:44:55:66
#define CONFIG_IPADDR  			192.168.6.187
#define CONFIG_SERVERIP        	192.168.6.186
#define CONFIG_GATEWAYIP      	192.168.1.1
#define CONFIG_NETMASK 		255.255.255.0
#endif
其中CONFIG_DM9000_BASE 地址为何是0x05000000,后续章节会详细分析。
6. FLASH移植 (EMMC)
- 移植EMMC需要添加一些源文件:
cmd_mmc.c
cmd_mmc_fdisk.c
cmd_movi.c
mmc.c
mmc.h
movi.c
movi.h
s5p_mshc.c
s5p_mshc.h
这些文件,由三星提供。
-
添加相关驱动
cp movi.c arch/arm/cpu/armv7/exynos/
修改文件arch/arm/cpu/armv7/exynos/Makefile在pinmux.o 后添加movi.o
修改板级文件 board/samsung/origen/origen.c,在
#include <asm/arch/mmc.h>
后面添加
#include <asm/arch/clk.h>
#include "origen_setup.h"
在
#ifdef CONFIG_GENERIC_MMC
后面添加
u32 sclk_mmc4;  /*clock source for emmc controller*/
#define __REGMY(x) (*((volatile u32 *)(x)))
#define CLK_SRC_FSYS  __REGMY(EXYNOS4_CLOCK_BASE + CLK_SRC_FSYS_OFFSET)
#define CLK_DIV_FSYS3 __REGMY(EXYNOS4_CLOCK_BASE + CLK_DIV_FSYS3_OFFSET)int emmc_init()
{u32 tmp;u32 clock;u32 i;/* setup_hsmmc_clock *//* MMC4 clock src = SCLKMPLL */tmp = CLK_SRC_FSYS & ~(0x000f0000);CLK_SRC_FSYS = tmp | 0x00060000;/* MMC4 clock div */tmp = CLK_DIV_FSYS3 & ~(0x0000ff0f);clock = get_pll_clk(MPLL)/1000000;for(i=0 ; i<=0xf; i++)  {sclk_mmc4=(clock/(i+1));if(sclk_mmc4 <= 160) //200{CLK_DIV_FSYS3 = tmp | (i<<0);break;}}emmcdbg("[mjdbg] sclk_mmc4:%d MHZ; mmc_ratio: %d\n",sclk_mmc4,i);sclk_mmc4 *= 1000000;/** MMC4 EMMC GPIO CONFIG** GPK0[0]	SD_4_CLK* GPK0[1]	SD_4_CMD* GPK0[2]	SD_4_CDn* GPK0[3:6]	SD_4_DATA[0:3]*/writel(readl(0x11000048)&~(0xf),0x11000048); //SD_4_CLK/SD_4_CMD pull-down enablewritel(readl(0x11000040)&~(0xff),0x11000040);//cdn set to be outputwritel(readl(0x11000048)&~(3<<4),0x11000048); //cdn pull-down disablewritel(readl(0x11000044)&~(1<<2),0x11000044); //cdn output 0 to shutdown the emmc powerwritel(readl(0x11000040)&~(0xf<<8)|(1<<8),0x11000040);//cdn set to be outputudelay(100*1000);writel(readl(0x11000044)|(1<<2),0x11000044); //cdn output 1writel(0x03333133, 0x11000040);writel(0x00003FF0, 0x11000048);writel(0x00002AAA, 0x1100004C);#ifdef CONFIG_EMMC_8Bitwritel(0x04444000, 0x11000060);writel(0x00003FC0, 0x11000068);writel(0x00002AAA, 0x1100006C);
#endif#ifdef USE_MMC4smdk_s5p_mshc_init();
#endif
}
将 int board_mmc_init(bd_t *bis)函数内容改写为
int board_mmc_init(bd_t *bis)
{int i, err;
#ifdef CONFIG_EMMCerr = emmc_init();
#endifreturn err;
}
在末尾添加
#ifdef CONFIG_BOARD_LATE_INIT
#include <movi.h>
int  chk_bootdev(void)//mj for boot device check
{char run_cmd[100];struct mmc *mmc;int boot_dev = 0;int cmp_off = 0x10;ulong  start_blk, blkcnt;mmc = find_mmc_device(0);if (mmc == NULL){printf("There is no eMMC card, Booting device is SD card\n");boot_dev = 1;return boot_dev;}start_blk = (24*1024/MOVI_BLKSIZE);blkcnt = 0x10;sprintf(run_cmd,"emmc open 0");run_command(run_cmd, 0);sprintf(run_cmd,"mmc read 0 %lx %lx %lx",CFG_PHY_KERNEL_BASE,start_blk,blkcnt);run_command(run_cmd, 0);/* switch mmc to normal paritition */sprintf(run_cmd,"emmc close 0");run_command(run_cmd, 0);return 0;
}int board_late_init (void)
{int boot_dev =0 ;char boot_cmd[100];boot_dev = chk_bootdev();if(!boot_dev){printf("\n\nChecking Boot Mode ... EMMC4.41\n");}return 0;
}
#endif
-
添加相关命令
$ cp    cmd_movi.c  common/
$ cp    cmd_mmc.c  common/
$ cp	cmd_mmc_fdisk.c  common/
修改common/Makefile
在
COBJS-$(CONFIG_CMD_MMC) += cmd_mmc.o
后添加
COBJS-$(CONFIG_CMD_MMC) += cmd_mmc_fdisk.o
COBJS-$(CONFIG_CMD_MOVINAND) += cmd_movi.o
添加驱动
$ cp   mmc.c  drivers/mmc/
$ cp   s5p_mshc.c  drivers/mmc/
$ cp   mmc.h  include/
$ cp   movi.h  include/
$ cp   s5p_mshc.h  include/
修改Makefile
$vim drivers/mmc/Makefile
添加
COBJS-$(CONFIG_S5P_MSHC) += s5p_mshc.o
-
添加EMMC相关配置
$vim include/configs/origen.h
添加
#define CONFIG_EVT1     1       /* EVT1 */
#ifdef CONFIG_EVT1
#define CONFIG_EMMC44_CH4 //eMMC44_CH4 (OMPIN[5:1] = 4)#ifdef CONFIG_SDMMC_CH2
#define CONFIG_S3C_HSMMC
#undef DEBUG_S3C_HSMMC
#define USE_MMC2
#endif#ifdef CONFIG_EMMC44_CH4
#define CONFIG_S5P_MSHC
#define CONFIG_EMMC             1
#define USE_MMC4
/* #define CONFIG_EMMC_8Bit */
#define CONFIG_EMMC_EMERGENCY
/*#define emmcdbg(fmt,args...) printf(fmt ,##args) *///for emmc debug
#define emmcdbg(fmt,args...)
#endif#endif /*end CONFIG_EVT1*/
#define CONFIG_CMD_MOVINAND
#define CONFIG_CLK_1000_400_200
#define CFG_PHY_UBOOT_BASE      CONFIG_SYS_SDRAM_BASE + 0x3e00000
#define CFG_PHY_KERNEL_BASE     CONFIG_SYS_SDRAM_BASE + 0x8000#define BOOT_MMCSD      0x3
#define BOOT_EMMC43     0x6
#define BOOT_EMMC441    0x7
#define CONFIG_BOARD_LATE_INIT
7. 重新编译u-boot
修改顶层Makefile,注释掉spl的编译:
623 #$(obj)spl/u-boot-spl.bin:  $(SUBDIR_TOOLS) depend
624 #       $(MAKE) -C spl all
重新编译uboot:
$ ./build.sh
在根目录下会生成bin文件u-boot-origen.bin。
二、SD卡制作
1. 烧写脚本
三星公司已经给我们提供了制作SD卡启动的烧写的脚本:
mkuboot.sh
#!/bin/bash#
# This script will create a u-boot binary for movinand/mmc boot
#echo "Fuse FS4412 trustzone uboot file into SD card"if [ -z $1 ] #判断参数1的字符串是否为空,如果为空,则打印出帮助信息
then./sd_fusing_exynos4x12.sh /dev/sdb u-boot-origen.bin
else./sd_fusing_exynos4x12.sh $1 u-boot-origen.bin
fi
sd_fusing_exynos4x12.sh
1 #!/bin/sh 2 #3 # Copyright (C) 2010 Samsung Electronics Co., Ltd.4 # #6 # This program is free software; you can redistribute it and/or modify7 # it under the terms of the GNU General Public License version 2 as8 # published by the Free Software Foundation.9 #10 ####################################11 reader_type1="/dev/sd"12 reader_type2="/dev/mmcblk0"13 14 if [ -z $2 ] #判断参数2的字符串是否为空,如果为空,则打印出帮助信息15 then16 echo "usage: ./sd_fusing.sh <SD Reader's device file> <filename>"17 exit 018 fi19 20 param1=`echo "$1" | awk '{print substr($1,1,7)}'`21 22 if [ "$param1" = "$reader_type1" ]23 then24 partition1=$1"1"25 partition2=$1"2"26 partition3=$1"3"27 partition4=$1"4"28 29 elif [ "$1" = "$reader_type2" ]30 then31 partition1=$1"p1"32 partition2=$1"p2"33 partition3=$1"p3"34 partition4=$1"p4"35 36 else37 echo "Unsupported SD reader"38 exit 039 fi40 41 if [ -b $1 ] #判断参数1所指向的设备节点是否存在42 then43 echo "$1 reader is identified."44 else45 echo "$1 is NOT identified."46 exit 047 fi48 49 ####################################50 # format51 umount $partition1 2> /dev/null52 umount $partition2 2> /dev/null53 umount $partition3 2> /dev/null54 umount $partition4 2> /dev/null55 56 echo "$2 fusing..."# 烧写u-boot-origen.bin到SD卡(512+8K)字节处, 512+8K=17x512,即第17个block57 dd iflag=dsync oflag=dsync if=$2 of=$1 seek=1 && \58 echo "$2 image has been fused successfully."59 60 #echo "zImage fusing..."61 #dd iflag=dsync oflag=dsync if=../../TC4_Kernel_3.0/arch/arm/boot/zImage of=$1 seek=1024 && \62 # echo "zImage has been fused successfully."63 64 #echo "ramdisk-uboot.img fusing..."65 #dd iflag=dsync oflag=dsync if=../../TC4_GB_2.3.4/out/target/product/smdk4212/ramdisk-uboot.img of=$1 seek=9216 && \66 # echo "ramdisk-uboot.img has been fused successfully."67 68 ####################################69 #<Message Display>70 echo "Eject SD card"71 2. 制作步骤
a) 创建文件mkuboot.sh、sd_fusing_exynos4x12.sh
b) 将SD卡插入电脑并被ubuntu识别
c) 拷贝编译好u-boot-origen.bin拷贝到当前目录下
root@ubuntu:/home/peng/uboot/sdfuse_q# ls
mkuboot.sh  sd_fusing_exynos4x12.sh  u-boot-origen.bin
d) 进入sdfuse_q执行如下操作
root@ubuntu:/home/peng/uboot/sdfuse_q#./mkuboot.sh /dev/sdb
d) 在SD卡中创建目录sdupdate,并把编译好的uboot镜像文件u-boot-origen.bin拷贝到这个目录。
3. 通过sd卡启动烧写uboot
a) 连接串口和板子,运行串口通信程序putty
选择右上角的”Serial”,然后点击左下角的”Serial”
按照自己的主机的情况选择COM口其他必须一直,然后点击open打开串口
b) 关闭开发板电源,将拨码开关SW1调至(1000)(SD启动模式)后打开电源
c) 将刚才做好的SD启动盘插入SD卡插槽
d) 重新打开开发板能够看到如下界面
在读秒倒计时时按任意键。
由上图所示,已经支持EMMC和dm9000网卡。
e) 烧写
在终端上执行
sdfuse flashall
注意:上面的命令把SD卡 sdupdate目录下的u-boot-origen.bin烧写到emmc起始位置
等待终端无输出是表示烧写结束
f) 关闭开发板电源,将拨码开关SW1调至0110(EMMC启动模式)后打开电源即可以从emmc启动
4. 网络烧写uboot
如果板子已经可以启动uboot,我们也可以通过网络烧写uboot。
步骤如下:
- 把编译好的u-boot-origen.bin拷贝到/tftpboot下
- 启动开发板,在u-boot下先下载u-boot-origen.bin到41000000;再运行
movi write u-boot 41000000
若编译后的u-boot-origen.bin 无法运行,可参考上一节,重新从SD卡引导烧写。
文中用到的uboot源码,清关公众号:一口Linux,后台回复 uboot 即可获得源码!
更多推荐
22.从0学ARM


发布评论