 错误信息"/>
Linux应用调试之配置修改内核打印用户态段错误信息
目录
1 驱动调试回顾
2 修改内核打印用户态段错误信息
3 编译要调试的应用程序
4 执行有问题的应用程序、调试
1 驱动调试回顾
前面驱动程序调试那里,我们在init函数里面故意没有对gpfcon寄存器地址进行ioremap,然后再open函数中给gpfcon寄存器赋值的时候就出现了段错误,然后报错的时候会打印一堆错误信息,我们根据出错时的PC值就可以找到出错的位置。那么我们可以让应用程序报错的时候也打印这些错误信息,这需要我们增加一些代码,我们驱动报错时打印的信息如下
2 修改内核打印用户态段错误信息
那么我们在内核源码中搜索Unable to handle kernel
grep "Unable to handle kernel" * -nR可以看到在arch下面的某种架构下面出现了很多东西,那我们进入到arch/arm目录下继续搜索,得到
/** Oops.  The kernel tried to access some page that wasn't present.*/
static void
__do_kernel_fault(struct mm_struct *mm, unsigned long addr, unsigned int fsr,struct pt_regs *regs)
{/** Are we prepared to handle this kernel fault?*/if (fixup_exception(regs))return;/** No handler, we'll have to terminate things with extreme prejudice.*/bust_spinlocks(1);printk(KERN_ALERT"Unable to handle kernel %s at virtual address %08lx\n",(addr < PAGE_SIZE) ? "NULL pointer dereference" :"paging request", addr);show_pte(mm, addr);die("Oops", regs, fsr);bust_spinlocks(0);do_exit(SIGKILL);
}
然后我们还能看到
void do_bad_area(unsigned long addr, unsigned int fsr, struct pt_regs *regs)
{struct task_struct *tsk = current;struct mm_struct *mm = tsk->active_mm;/** If we are in kernel mode at this point, we* have no context to handle this fault with.*/if (user_mode(regs))__do_user_fault(tsk, addr, fsr, SIGSEGV, SEGV_MAPERR, regs);else__do_kernel_fault(mm, addr, fsr, regs);
}
应用程序执行的时候,有可能在用户态,有可能在内核态,在用户态的时候出错用__do_user_fault打印,在内核态出错就用__do_kernel_fault。然后我们看一下__do_user_fault代码(arch/arm/mm/fault.c)
/** Something tried to access memory that isn't in our memory map..* User mode accesses just cause a SIGSEGV*/
static void
__do_user_fault(struct task_struct *tsk, unsigned long addr,unsigned int fsr, unsigned int sig, int code,struct pt_regs *regs)
{struct siginfo si;#ifdef CONFIG_DEBUG_USERif (user_debug & UDBG_SEGV) {printk(KERN_DEBUG "%s: unhandled page fault (%d) at 0x%08lx, code 0x%03x\n",tsk->comm, sig, addr, fsr);show_pte(tsk->mm, addr);show_regs(regs);}
#endiftsk->thread.address = addr;tsk->thread.error_code = fsr;tsk->thread.trap_no = 14;si.si_signo = sig;si.si_errno = 0;si.si_code = code;si.si_addr = (void __user *)addr;force_sig_info(sig, &si, tsk);
}
如果我们想让打印能够打印出来,那需要满足两个条件
- #ifdef CONFIG_DEBUG_USER,通过配置内核满足该条件
- if (user_debug & UDBG_SEGV) {, 通过uboot命令行参数满足该条件
条件if (user_debug & UDBG_SEGV),其中#define UDBG_SEGV (1 << 3),变量user_debug在
#ifdef CONFIG_DEBUG_USER
unsigned int user_debug;static int __init user_debug_setup(char *str)
{get_option(&str, &user_debug);return 1;
}
__setup("user_debug=", user_debug_setup);
#endif
这里__setup("user_debug=", user_debug_setup);是指BootLoader启动的时候可以传入这些参数,
set bootargs console=ttySAC0 root=/dev/nfs nfsroot=192.168.1.123:/work/nfs_root/first_fs ip=192.168.1.17 ipaddr=192.168.1.17 user_debug=0xff3 编译要调试的应用程序
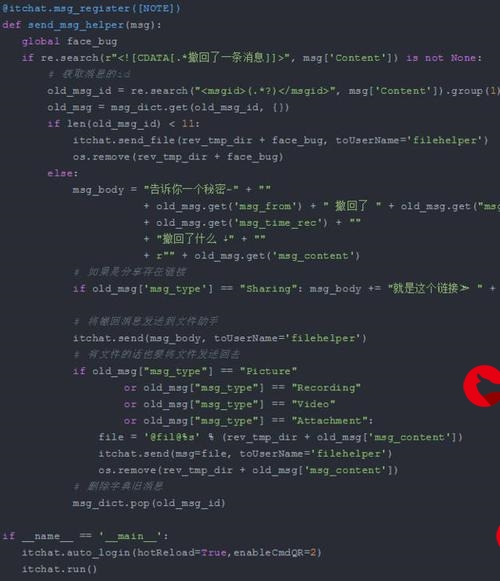
#include <stdio.h>void C(int *p)
{*p = 0x12;
}void B(int *p)
{C(p);
}void A(int *p)
{B(p);
}void A2(int *p)
{C(p);
}int main(int argc, char **argv)
{int a;int *p = NULL;A2(&a);  // A2 > Cprintf("a = 0x%x\n", a);A(p);    // A > B > Creturn 0;
}
4 执行有问题的应用程序、调试
运行应用程序后,打印如下信息
./test_debug
a = 0x12
pgd = c04c8000
[00000000] *pgd=33d08031, *pte=00000000, *ppte=00000000Pid: 772, comm:           test_debug
CPU: 0    Not tainted  (2.6.22.6 #1)
PC is at 0x84ac
LR is at 0x84d0
pc : [<000084ac>]    lr : [<000084d0>]    psr: 60000010
sp : bed9fe40  ip : bed9fe54  fp : bed9fe50
r10: 4013365c  r9 : 00000000  r8 : 00008514
r7 : 00000001  r6 : 000085cc  r5 : 00008568  r4 : bed9fec4
r3 : 00000012  r2 : 00000000  r1 : 00001000  r0 : 00000000
Flags: nZCv  IRQs on  FIQs on  Mode USER_32  Segment user
Control: c000717f  Table: 304c8000  DAC: 00000015
[<c002cd1c>] (show_regs+0x0/0x4c) from [<c0031a98>] (__do_user_fault+0x5c/0xa4)r4:c04a6840
[<c0031a3c>] (__do_user_fault+0x0/0xa4) from [<c0031d38>] (do_page_fault+0x1dc/0x20c)r7:c00261e0 r6:c0024cf8 r5:c04a6840 r4:ffffffec
[<c0031b5c>] (do_page_fault+0x0/0x20c) from [<c002b224>] (do_DataAbort+0x3c/0xa0)
[<c002b1e8>] (do_DataAbort+0x0/0xa0) from [<c002be48>] (ret_from_exception+0x0/0x10)
Exception stack(0xc3e7bfb0 to 0xc3e7bff8)
bfa0:                                     00000000 00001000 00000000 00000012
bfc0: bed9fec4 00008568 000085cc 00000001 00008514 00000000 4013365c bed9fe50
bfe0: bed9fe54 bed9fe40 000084d0 000084ac 60000010 ffffffff                   r8:00008514 r7:00000001 r6:000085cc r5:00008568 r4:c039bfc8
Segmentation fault
然后反汇编我们的应用程序
arm-linux-objdump -D test_debug > test_debug.dis然后再里面搜索出错的PC 84ac得到出错位置是在C函数中
00008490 <C>:8490: e1a0c00d mov ip, sp8494: e92dd800 stmdb sp!, {fp, ip, lr, pc}8498: e24cb004 sub fp, ip, #4 ; 0x4849c: e24dd004 sub sp, sp, #4 ; 0x484a0: e50b0010 str r0, [fp, #-16]84a4: e51b2010 ldr r2, [fp, #-16]84a8: e3a03012 mov r3, #18 ; 0x1284ac: e5823000 str r3, [r2] // r3=0x12, r2=084b0: e89da808 ldmia sp, {r3, fp, sp, pc}这里是把r3存到r2地址那里,r2=0,那么相当于保存到0地址,当然会报错。
至此配置修改内核打印用户态段错误信息的介绍已经结束了。
更多推荐
Linux应用调试之配置修改内核打印用户态段错误信息


发布评论